How to Use GitHub Without CLI (Command Line Interface)

Written by
Adeyemi Adetilewa

Most articles about Git and GitHub assume you have a terminal open and are comfortable typing commands like git reset --hard HEAD~1.
If that sentence already lost you, this article on how to use GitHub without CLI is for you. Everything covered here is achievable entirely through the GitHub web interface in your browser: no installations, no command line, no Git clients. Just a browser tab and your GitHub account.
What GitHub Actually Is (and What It Is Not)
GitHub is a website that stores your code and tracks every change ever made to it. That is the core function. Everything else (pull requests, branches, commit history) is built on top of that tracking system.
Git itself is the underlying version control system that powers all of this. GitHub is just a web-based interface for Git. You can use Git without GitHub (via the command line), but you can also use GitHub without ever touching the command line, which is what this article covers.
The GitHub web interface does not expose every Git feature. Some advanced operations (like force-pushing or rebasing) require the command line. But the most important day-to-day actions and most emergency recovery steps are fully available in the browser.
The Four Areas of GitHub You Need to Know
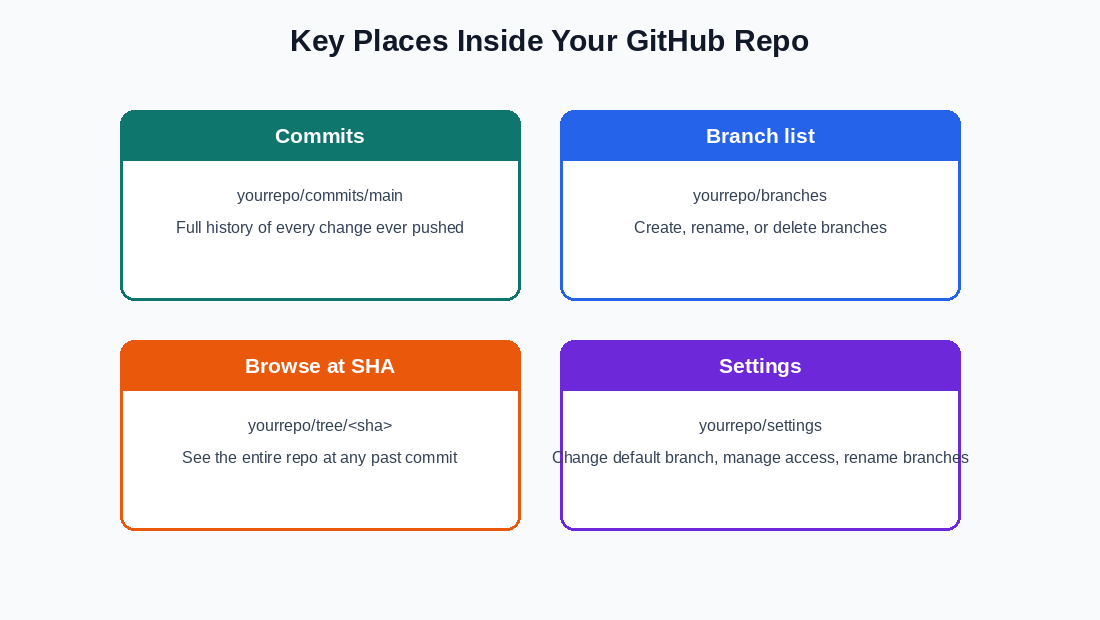
1. Commit History (yourrepo/commits/main)
This is your change log. Every time anyone pushes code to your repository, a commit is created with a unique identifier (the SHA), a message describing the change, and a timestamp. This is where you go to find the “last good version” of your code after something breaks.
2. Branch List (yourrepo/branches)
Branches are parallel versions of your codebase. The main branch is typically what gets deployed to your live site.
Other branches are for work in progress, staging, or experimentation. You can create, rename, and delete branches entirely from this page.
3. Browse at a Specific SHA (yourrepo/tree/<sha>)
This is the most useful URL for recovery scenarios. Replace <sha> with any commit SHA from your history, and GitHub shows you the entire repository exactly as it existed at that moment in time. You can browse files, read their contents, and even create a new branch from that point.
4. Settings
This is where you change the repository’s default branch, manage collaborators, rename the repository, and handle other administrative tasks. The “Default branch” option under General is particularly important: it controls which branch Vercel (or any other deployment tool) treats as the production source.
How to Read the Commit History Page
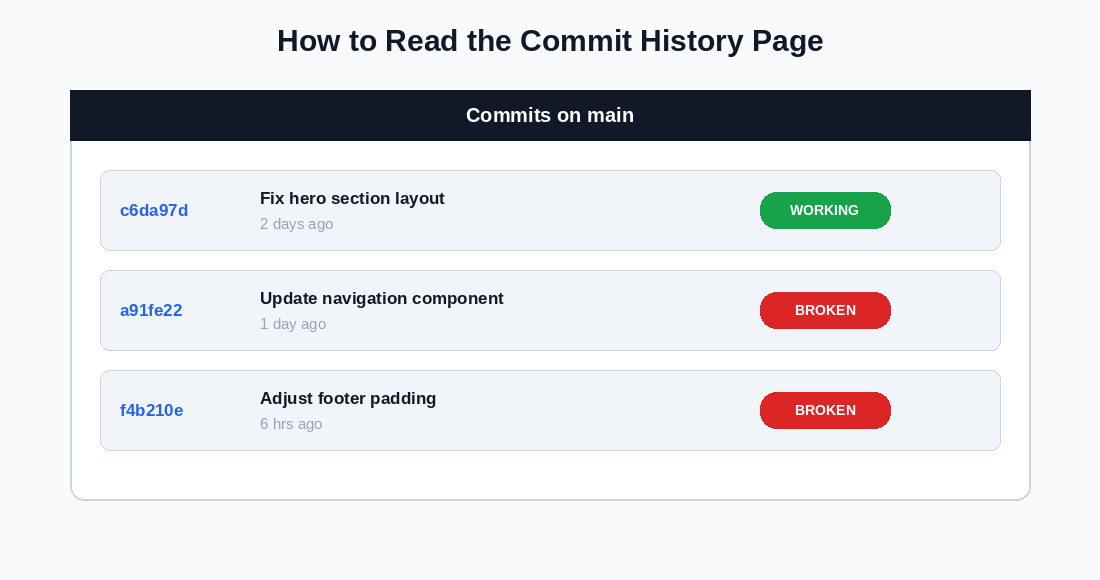
When you open your commit history, each entry shows four pieces of information:
1. The short SHA
A 7-character abbreviation of the full 40-character commit identifier. Clicking it takes you to a detailed view of exactly what changed in that commit.
2. The commit message
What the person who made the change wrote to describe it. Quality varies. Sometimes it says “fix layout issue.” Sometimes it says “update.” The timestamp is often more useful for identifying when something broke.
3. The timestamp
When the commit was pushed. If your site broke at 3 pm on Tuesday, you are looking for the commit made just before that time.
4. Browse button
The <> icon next to each commit takes you to the full repo as it existed at that exact point. This is how you get to the yourrepo/tree/<sha> URL.
The full 40-character SHA is available when you click into an individual commit. Copy it carefully. It is easy to accidentally grab an extra character from the URL bar.
How to Create a Branch From a Past Commit
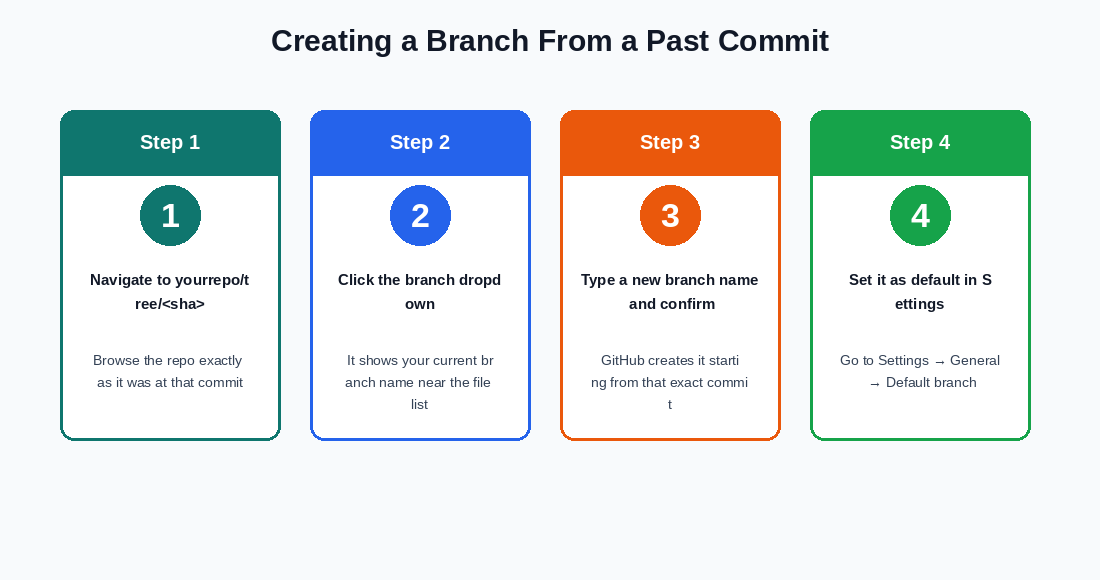
This is the core skill for recovering from a bad deployment entirely through the browser.
Step 1: Navigate to the past commit.
Go to yourrepo/tree/<sha> where <sha> is the full 40-character commit SHA from your history. You should see your entire repository as it existed at that moment.
Step 2: Click the branch dropdown.
Near the top-left of the file list, there is a dropdown showing your current branch name (usually “main”). Click it.
Step 3: Type a new branch name and confirm.
In the text field that appears, type a name for your new branch, such as restored-main or main-working. GitHub will offer to create this branch starting from the commit you are currently viewing. Confirm the creation.
Step 4: Set it as the default branch.
Go to your repository Settings, find the “Default branch” section under General, and switch it from main to your new branch. This tells GitHub (and tools like Vercel that are connected to your repo) to treat your new branch as the production source.
You have now effectively moved your project back in time, without deleting anything, without the command line, and without force-pushing.
Common Scenarios and How to Handle Them in the Browser
1. “My site is broken, and I need to find when it broke.”
Open your commit history page. Work backwards from the current time, checking commit messages and timestamps. If Vercel is connected, its deployment history also shows commit SHAs, so you can match the broken deployment to a specific commit.
2. “I want to undo a specific change I made to one file.”
Navigate to yourrepo/tree/<good-sha> and find the file in question. Click it to see its contents. Copy everything. Then go back to your main branch, find the same file, click the pencil (edit) icon, paste the old content over the current content, and commit the change.
3. “I accidentally deleted a file.”
Find the commit just before the deletion using your history. Navigate to yourrepo/tree/<sha> and open the file you need. Copy its full contents. Go back to your current branch, click “Add file” to create a new file with the same path and name, paste the contents, and commit.
4. “I want to go back to an old version of the whole site without losing anything.”
Use the new branch method described above: browse the repo at the good commit SHA, create a new branch from it, and set that branch as your default. The old branch (with the bad commits) remains intact and accessible in case you need anything from it later.
What the Command Line Can Do That the Browser Cannot
It is worth being honest about the limits of browser-only Git use. Some things require the command line:
1. Force-pushing: Overwriting your branch history so that the bad commits are no longer in the main branch’s history at all. The browser approach leaves bad commits visible in a separate branch rather than erasing them from the main branch’s history.
2. Interactive rebasing: Rewriting, reordering, or squashing multiple commits in one operation.
3. Cherry-picking: Applying a specific commit from one branch onto another without merging the entire branch.
4. Local builds and testing: You cannot run next build or a local dev server without a local environment.
None of these are required for the most common recovery scenarios. The browser is fully sufficient for stopping a broken deployment, restoring a working version, and keeping your repository in a clean state.
TL; DR: How to Use GitHub Without CLI
If you never read another Git article, keep these five things in mind:
1. Your commit history is at yourrepo/commits/main. It is your most important recovery tool.
2. Every commit has a full 40-character SHA that uniquely identifies it.
3. You can browse your entire repo at any past commit by going to yourrepo/tree/<sha>.
4. You can create a new branch from any past commit directly in the browser.
5. Changing the default branch in Settings is how you make that new branch the one your deployment tool uses.
That covers roughly 90% of what most non-developer website owners need from Git, and none of it requires opening a terminal.
Tags
Share
About the author
Adeyemi Adetilewa
Content Strategy, Product Marketing, and SEO for B2B SaaS
Adeyemi Adetilewa combines expertise in content strategy, product marketing, technical SEO, and AI to help B2B SaaS companies drive product adoption, customer engagement, and sustainable organic growth. Open to remote Product Marketing roles.
Work With Me
Hiring for product marketing, or scaling a B2B SaaS?
I help B2B SaaS companies turn product marketing, content strategy, and technical SEO into systems that drive adoption and organic growth. Open to full-time product marketing roles, contract work, and consulting engagements.
The Digital Strategy Newsletter
Get more like this in your inbox.
Practical insights on SEO, AEO, content strategy, and product building. Free, every week.
Free. View archive. Cancel any time.
Related Content You Might Like

How I Broke My Live Website and Fixed It Without Writing a Single Line of Code
This is not a theoretical article. I broke my live website, adeyemiadetilewa.com, with a push to GitHub. The build succeeded. Vercel deployed it. And within minutes, I was staring at a broken homepage with no featured blog posts, an empty blog page with no blog posts, and some other missing files. I had a browser, … Read more
Adeyemi Adetilewa
Content Strategy, Product Marketing, and SEO for B2B SaaS

Website Deployment Failure and Recovery Process for GitHub and Vercel
One bad push to GitHub broke my live website. The build succeeded, Vercel deployed it without complaint, and within minutes adeyemiadetilewa.com was serving a broken layout to every visitor who landed on it. What followed was a website recovery process that took under ten minutes, required no terminal, no Git client, and no local development … Read more
Adeyemi Adetilewa
Content Strategy, Product Marketing, and SEO for B2B SaaS

Why You Should Have a Staging Branch Before Pushing to Main Branch
Pushing to main branch directly without having a staging branch is one of those habits that feels efficient right up until it is not. Your workflow is fast, your changes go live immediately, and there is no friction between writing code and seeing it deployed. Then one day you push something to main branch directly … Read more
Adeyemi Adetilewa
Content Strategy, Product Marketing, and SEO for B2B SaaS